

Estimated reading time: 8 minutes
Emergency candles have been a survival staple for generations, but carrying loose candles and matches is a sloppy solution. They roll around, get lost, and offer no wind protection when you actually need a flame. That’s where a little historical inspiration goes a long way.
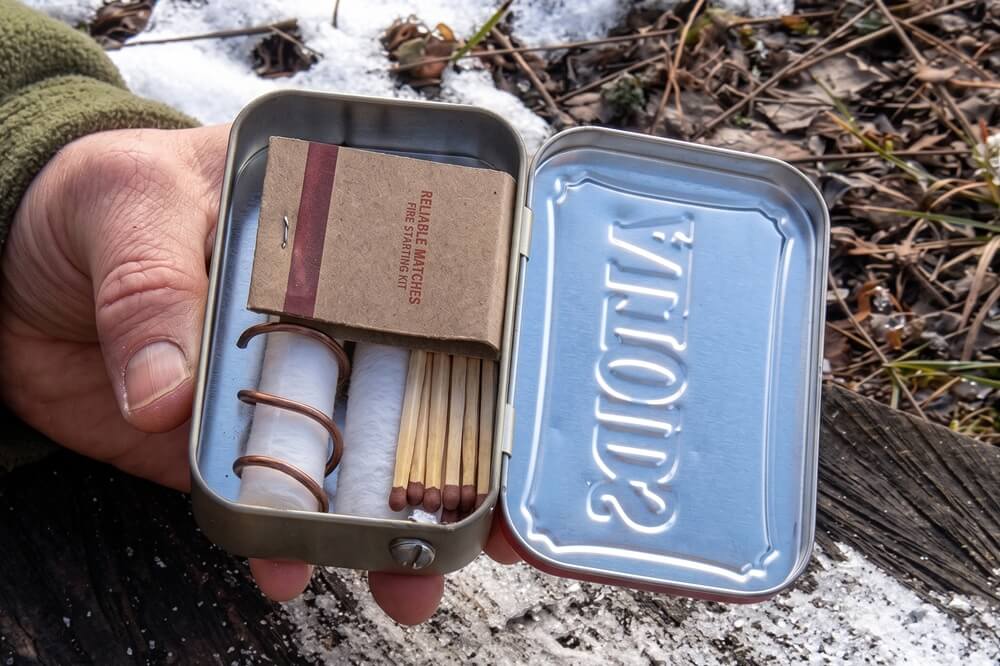
The Civil War era produced some remarkably clever field gear, born out of necessity and built from whatever was on hand. This candle lantern design draws directly from that tradition. It’s compact, functional, and built from common materials. It holds up to three candles and a book of matches, and it doubles as a wind break and reflector.
I came across this particular tutorial on the YouTube channel WayPoint Survival, hosted by James Bender, who adapts the old-school design using an Altoids tin. This is one of those projects that’s both quick to build and genuinely worth having. You can watch the video and read the instructions below.
Want to save this post for later? Click Here to Pin It On Pinterest!
What You’ll Need
- 1 standard Altoids tin
- About 9 inches of 12-gauge copper wire
- 1 nail (a 16-penny nail works well)
- 1 small pan-head bolt (¼ inch) with matching nut and washer
- Blue (medium-strength) thread locker
- A book of matches
- Phillips head screwdriver
- 1 standard tapered candle
- Multitool or needle-nose pliers
Step-by-Step Instructions
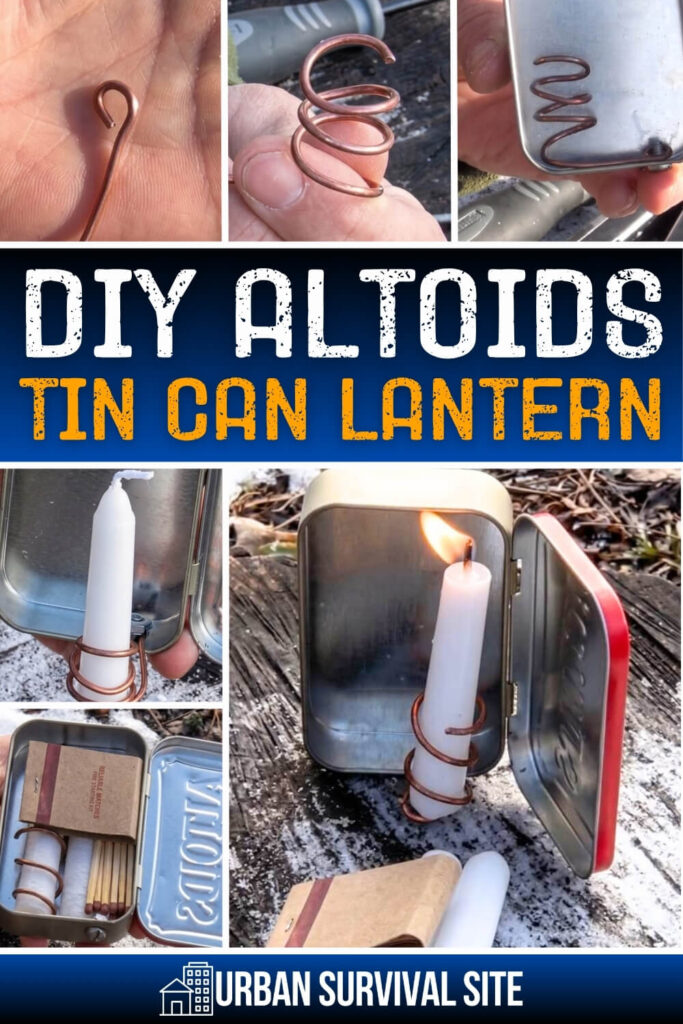
Step 1: Form the Loop at the End of Your Wire
Take one end of your 9-inch piece of 12-gauge wire and bend it into a small loop using your pliers. The loop doesn’t need to be perfectly tight, just round enough for the bolt to pass through cleanly. This loop is what will fasten the wire coil to the inside of the tin, so take a moment to adjust it until it’s roughly circular.
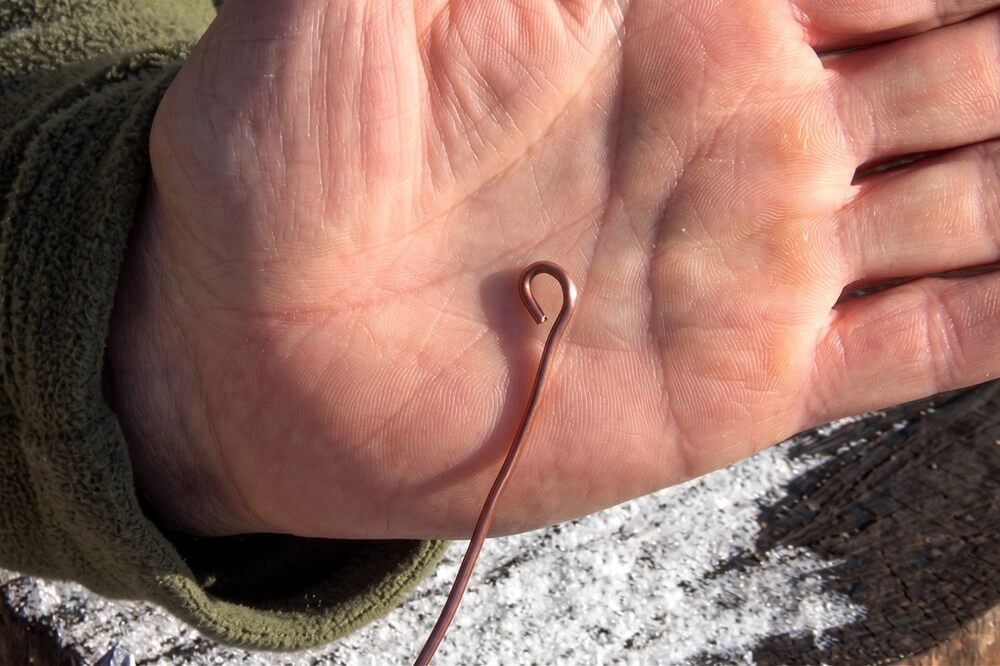
Step 2: Coil the Wire Around a Candle
Open the Altoids tin and hold it up to check the interior length. You’ll want the finished coil to fit inside without being longer than the tin’s inner wall.
Once you have a sense of the length, wrap the wire around a candle to form a coil. Work around the candle in tight, even loops, using all of the wire. The coil should be snug enough to hold a candle upright but adjustable. Slide the coil off the candle when done.

Step 3: Adjust and Shape the Coil
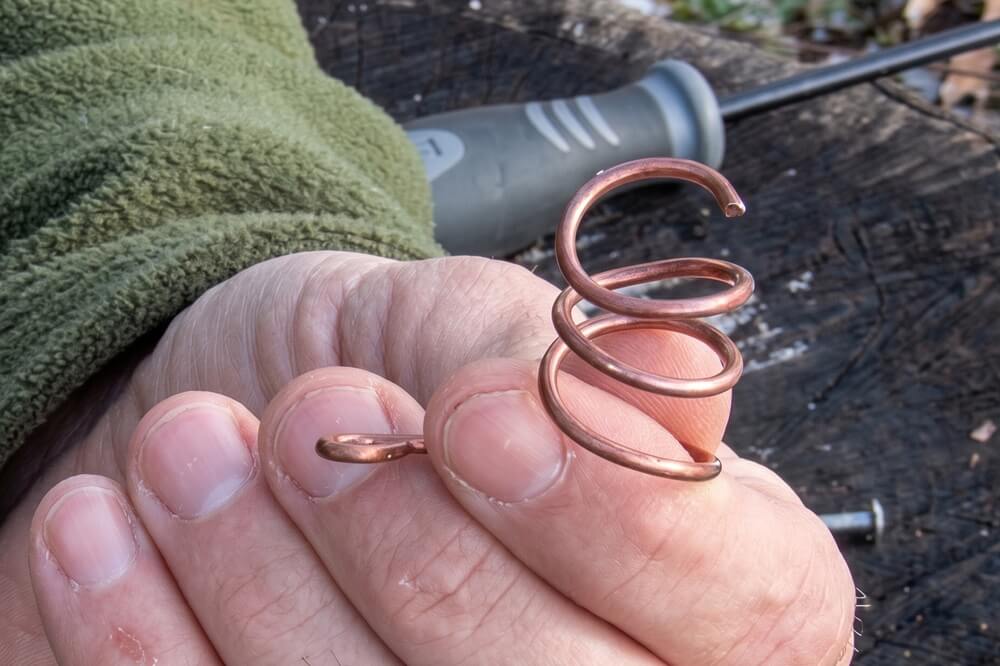
Spread the coils apart slightly to give the holder some height. Use your pliers to make sure the wire is fully rounded with no flat sections. An even circular shape will help the candle sit straight. The small loop you formed in Step 1 should still be intact at the top end of the coil.
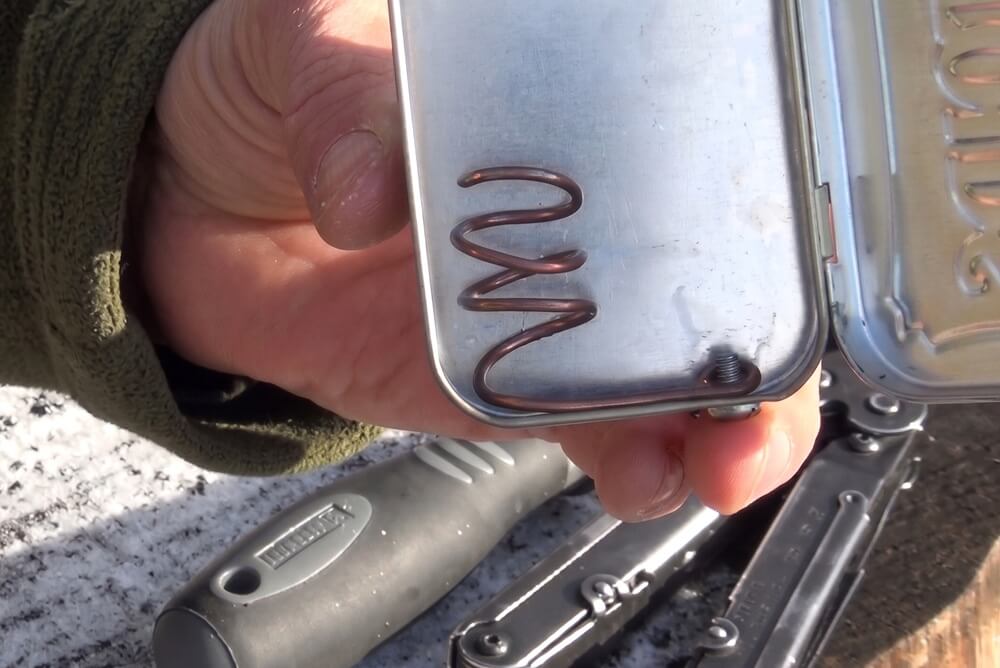
Step 4: Punch a Hole in the Tin
Open the Altoids tin and determine where the bolt hole needs to go. Position the coil inside the tin so it can swing freely and pivot upright. Mark that spot on the interior wall of the tin with the tip of your nail, pressing down just enough to leave a scratch.
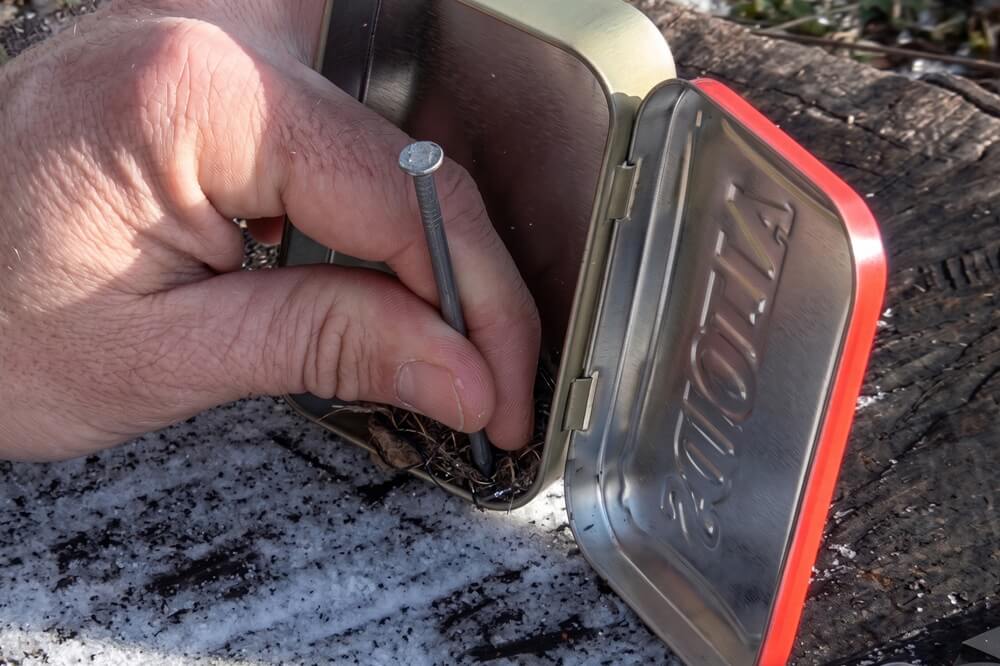
With the tin held steady, use the nail and the handle of your screwdriver (as a makeshift hammer) to punch through the tin at your marked spot. Once through, wiggle the nail around in a small circle to open the hole up slightly.
Use your multi-tool to press down any sharp or jagged edges around the hole so there’s nothing to cut yourself on later.
Step 5: Mount the Coil with the Bolt
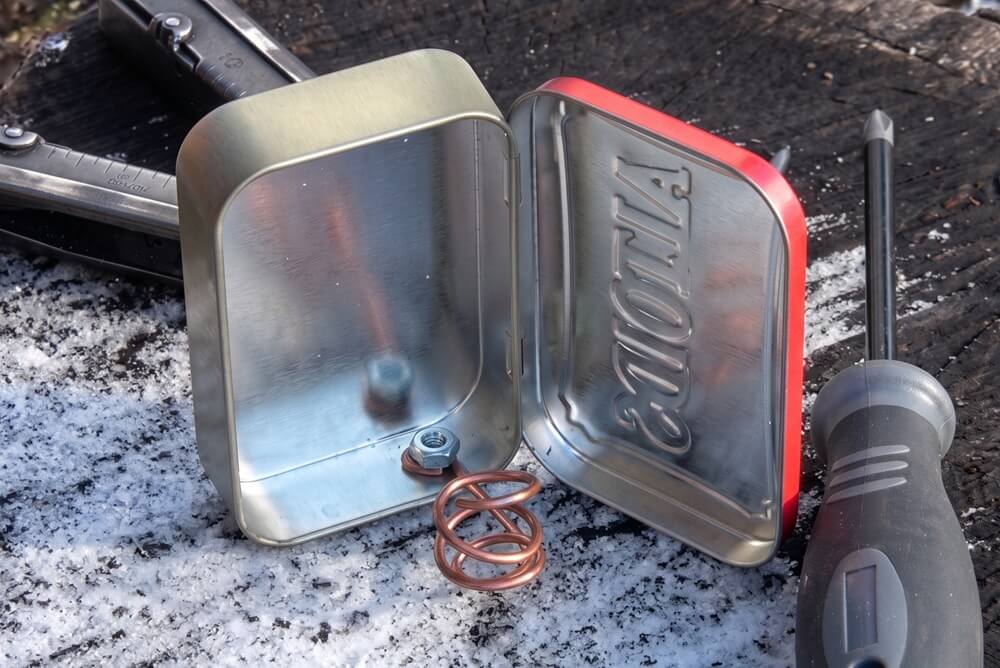
Insert the pan-head bolt through the hole from the outside of the tin. The pan head sits flush against the outer wall. From the inside, slip the wire loop over the bolt, then add the washer on top of the loop, and thread the nut on last.
Do a test fit first. Make sure the coil can pivot freely and that the nut and washer seat properly. Once you’re satisfied with the fit, remove the nut, apply a small drop of blue thread locker to the bolt threads, and reinstall the nut.
Tighten it down with your pliers until snug. You don’t need to crank it down hard. The thread locker will secure it once it cures, and the medium-strength formula means you can still disassemble it later if needed.
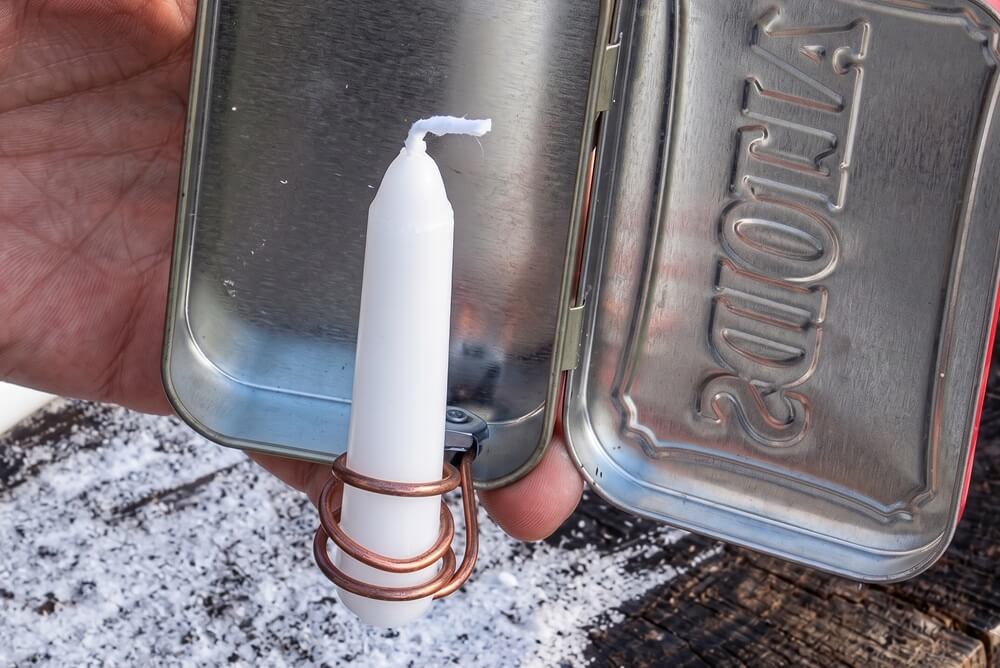
Step 6: Shape the Bottom of the Coil into a Candle Rest
With the coil mounted and pivoting freely, adjust it so it acts as a third leg when the tin is propped open. This is what holds the whole lantern upright.
Then take the bottom end of the coil and bend it inward, twisting it to form a small flat platform. This becomes the seat that the candle rests on when dropped down into the coil.
Step 7: Size and Prepare Your Candles
A standard full-length taper candle is too long to store inside the tin. Break it down to size, roughly the length of the tin’s interior, by snapping it with your hands.
Drop the candle down into the coil so it seats on the small platform you formed at the bottom. It should sit upright and stable.
Step 8: Pack and Store
The finished lantern holds up to three candles and a book of matches inside the tin when closed. Store the candles one down, one up to maximize space, tuck the matches in alongside them, and close the lid.
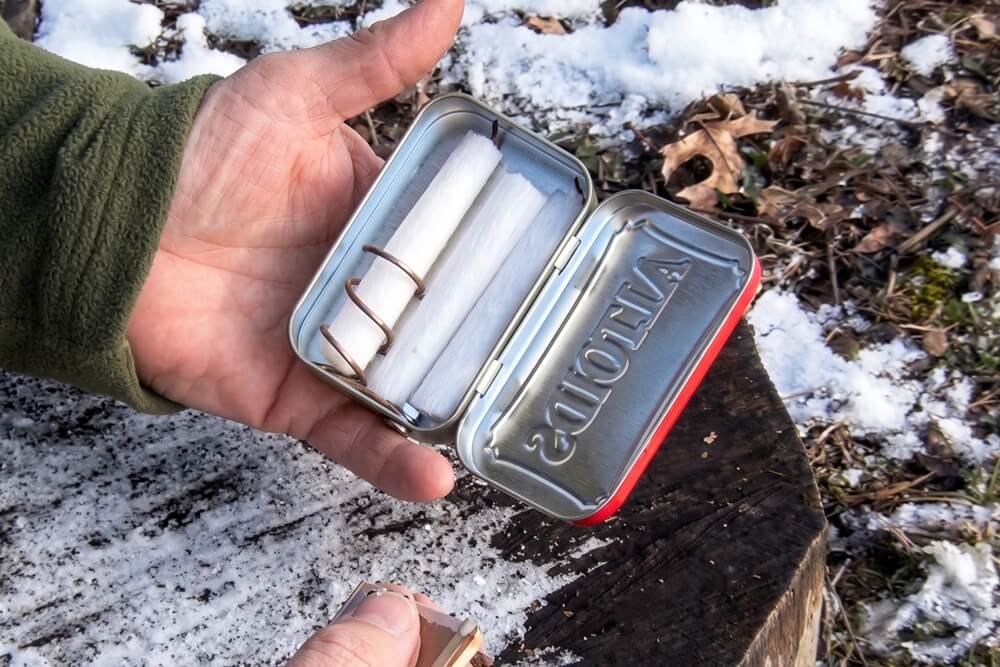
Each candle cut to this length will burn for approximately 1 hour and 15 minutes, giving you just under 4 hours of total light from three candles.
Using Your Candle Lantern
To use the lantern, open the tin and swing the candle coil out so it stands upright on its coil “leg.” Position the tin so the open lid faces the direction the light is most needed. The reflective interior of the Altoids tin bounces light outward and into your space. The lid and walls also act as a partial wind break, helping shield the flame in light to moderate wind.
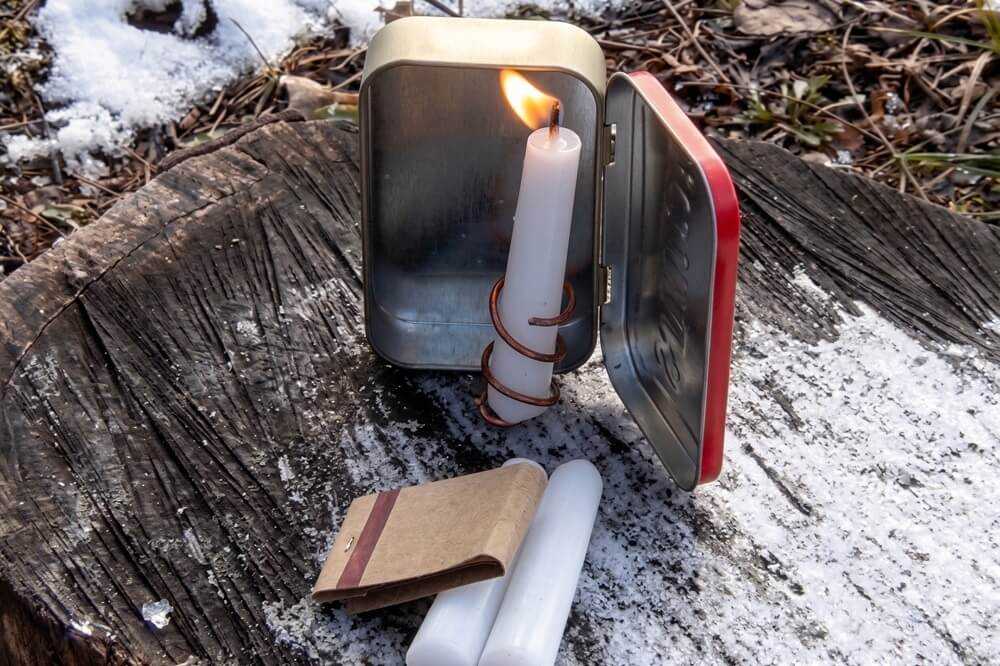
When you’re done, blow out the candle, swing the coil back inside, and close the tin. The whole kit slips into a jacket pocket or pack pouch without issue.
Like this post? Don’t Forget to Pin It On Pinterest!
You May Also Like:

Read the full article here

