
Every survival course I teach includes some element of knife skills training. This happens early in the course to assess the students’ skillset. Under a watchful eye, I can tell if a student needs more guidance and supervision with sharp cutting tools or if they will be ok working on knife projects with more autonomy. The best way to gauge a student’s knife skills is with a bushcraft try stick.
Make A Bushcraft Try Stick
Most often attributed to the late Mors Kochanski, the try stick is a test of your knife skills on a practice branch. Some of the cuts are meant for future use in campcraft projects, and some work well for wooden trap triggers. Others can be scaled up for use around the camp kitchen, and others primarily to establish the extent of your capability. Rather than grabbing a random stick and carving it into a vampire slayer, follow these simple instructions to make your own try stick.
The Stick
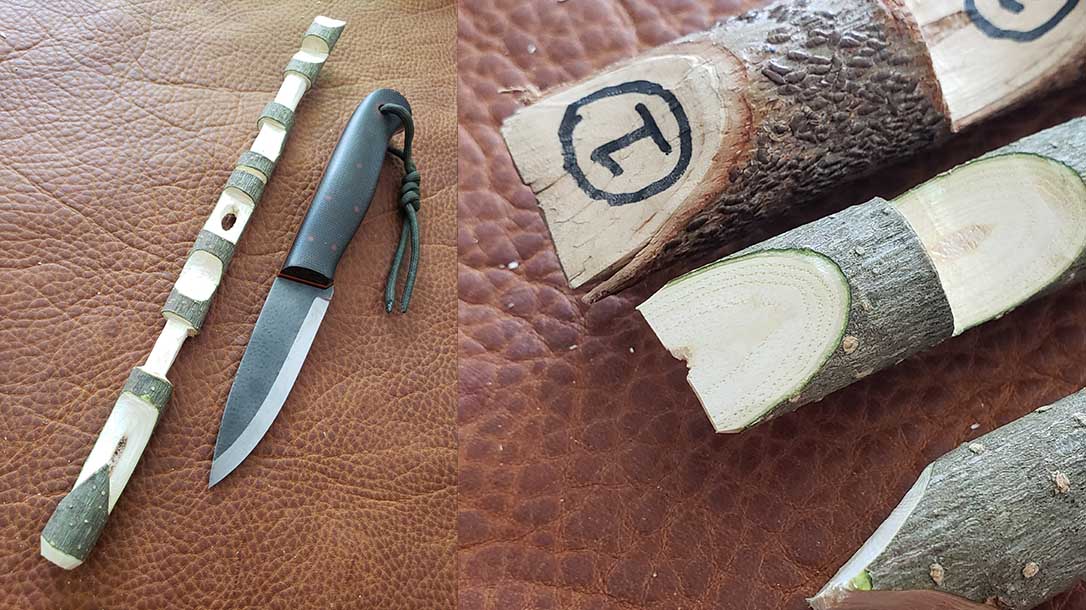
The ideal bushcraft try stick wood is green, about thumb thickness, straight-grained, and free of knots. Deadwood is significantly harder to carve as there is less moisture content. You can always make a try stick out of wood thicker or thinner than your thumb. The thicker the wood, the more you have to carve away.
On the contrary, if you work with thinner wood, the wood may snap as you remove material and apply too much pressure. Regardless of the thickness, you should look for straight-grained wood that is free of knots, giving you the easiest path to carving. Knots are where new branches will form along a branch, and the grain structure becomes condensed and difficult to cut through. Willow, birch, and basswood all make excellent choices.
Specific Techniques
When you carve any cuts into your try stick, remember to keep the knife and stick in your workspace and away from the blood triangle that exists between your legs and contains the femoral arteries. One of the ways to stay safe when carving is to sit down and rest your elbows on the top of your thighs. This keeps the blade and stick further away from your body, whereas the worst injury is a cut to the palm of your hand or a digit.
Carving closest to the ricasso on the blade gives you the best leverage and control. For some of the cuts requiring more pressure, you may find using the side of a tree or a stump in the ground as an anvil easier than holding the stick in the air and applying opposing pressure with both hands. If your try stick is long enough, you can tuck the non-working end under your arm for an added measure of security.
As you work the blade into the crooks and recesses of the more elaborate cuts, different grips (hammer, saber, foil, reversed, pinch, etc) will work better for more control.
Different Types of Cuts
The bushcraft try stick is meant for practice, and depending on your perspective and background, you can use it to stay sharp for trap-making, building camp kitchen utensils and fixtures, or just passing the time. Since students approach the try stick from different backgrounds, they bring different knives around the learning circle, and you get to see which blades work best for each type of cut.
While some knives feel better in the hand than others, any knife worth its salt should perform without issue. At the end of the exercise, the form of the final product will be a focus of yours. A single try stick can have a dozen or more unique cuts. Some of these include,
Chisel/Screwdriver Tip: Rather than carving the end of a stick to a single point, a chisel or screwdriver tip is a more robust option. It makes a great digging stick or as an interface for trap building. It also works well as a splitting wedge.
You can create the tip of your chisel/screwdriver in the dead center of the wood or offset. The tip of a tent stake will also determine how it drives into the ground.
Beveled End: The beveled end is how all cut branch ends used for tools should be finished. By removing the outer bark at an angle and leaving the center of the wood at the high point, there is less chance of the wood splitting with impact. When you learn to bevel the end of a try stick, it will be hard looking at the hard corner of a wooden tool without wanting to trim it.
90 Degree Latch: Resembling a sharp 90-degree hook, this 90-degree latch will hold against another 90-degree latch or a flat surface carved into a round branch. This latch is typical in the “L7” trap trigger and the Figure 4 trap trigger. Around the bushcraft camp, the 90-degree latch is ideal for campfire pot hangers.
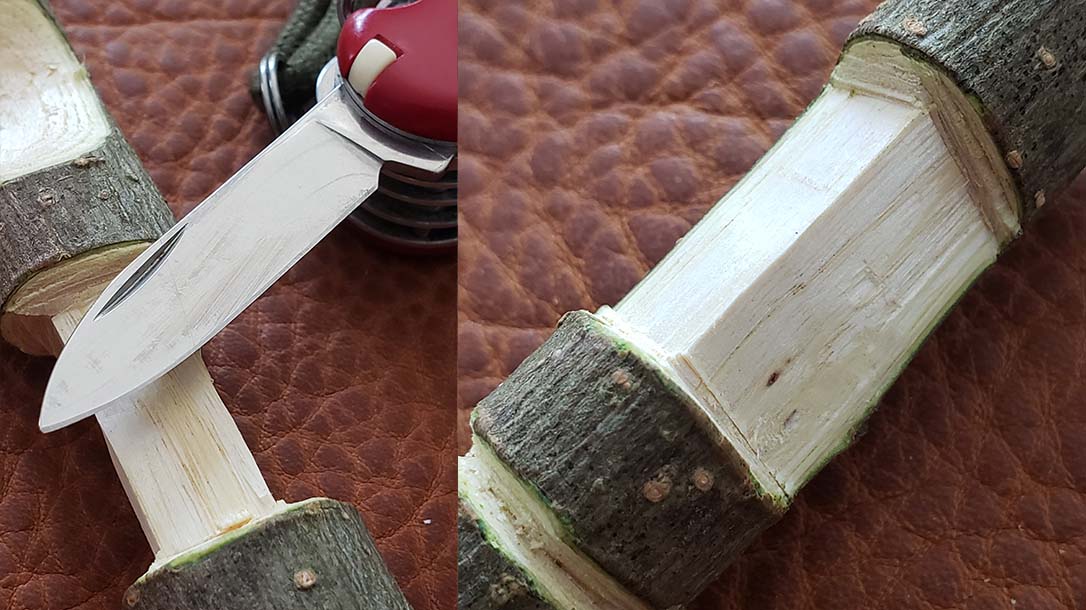
90-Degree Corner: This cut creates two flat sides on a round branch. The two sides are perpendicular to one another and create a corner like those found in your home. A correctly cut 90-degree corner has uniform depth on the four ends of both sides. With the four cuts mentioned thus far, you have the cuts you need to make a figure 4 deadfall trigger.
Diameter Reduction: When material is removed around the circumference of a stick, the diameter can be reduced. Think of the thickness of a baseball bat barrel to that of the handle. Much like a baseball bat, only more dramatic, a baton made from a hardwood log with a reduced-diameter handle is an ideal camp tool using this technique.
Pot-Hanging Hook: If a pot has a wire bail, it can be securely suspended with a true pot-hanging hook. This hook has a point carved into it and an undercut section that prevents the bail from sliding off the hook. This hook works great on the end of tent stakes for a secure tie-off point.
Groove: The groove is a recess around the circumference of a branch. Uses vary from securing cordage to a branch toscoring a branch prior to breaking. This second function is one way a smaller knife can cut through a larger branch.
Key Concepts and Takeaways:
A bushcraft try stick is just as much about the process as the product. While you should strive to create a professional-looking product with clean cuts, you should take stock of how you achieve the desired results. Instead of attempting to remove all the material with a couple of cuts, take your time and whittle.
That process means removing a little wood at a time. Look at the various cuts you’re making and look at them under different lighting. A good cut in the try stick will be free of jagged ends, uneven surfaces, or too many facets. Learn to use stop cuts (those made perpendicular against the grain) to halt your progress as you cut with the grain. The process of working on a try stick may cause anxiety when you are first learning how to use your knife, but with confidence, you’ll find the process is calming and therapeutic.
You’ll also discover shortcuts (no pun intended), like using a good wood saw found on a Swiss Army Knife or Leatherman to rough cut a shape in the try stick before you smooth it out with your knife. As you create more try sticks and improve your skills, you’ll notice you’ll have a preference for the type of wood you work with, along with finding the optimal wood to complete the project. With enough practice, the try stick won’t be as trying.
For even more bushcraft, be sure to check this out: Survival Myths


Didn’t find what you were looking for?
Read the full article here

