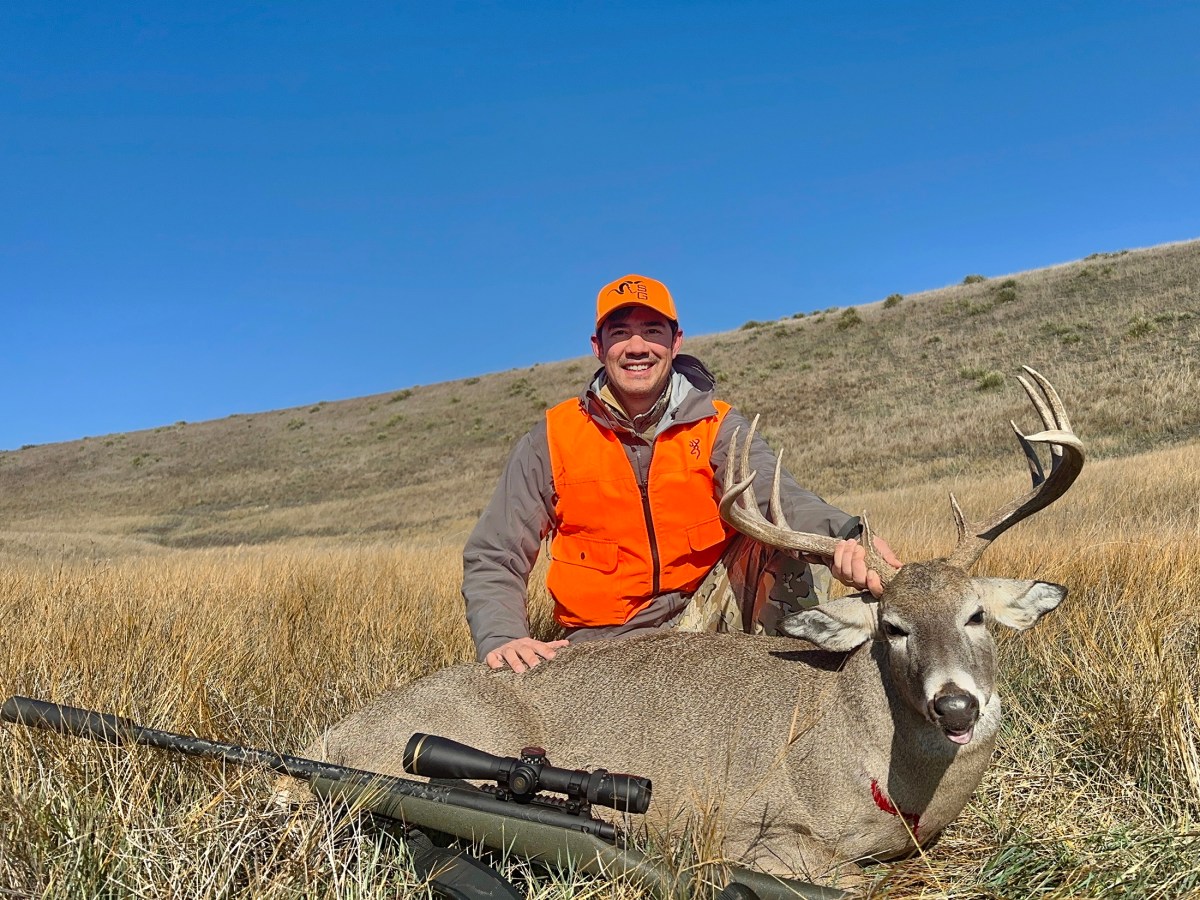
Out in the draw, about 800 yards away, a deer’s antlers glimmered in the sun. With my binocular I could tell that he was a nice whitetail buck. Through my spotting scope I realized he was a shooter, settled in his midday bed with a doe.
Between me and the buck there was a small hill that I ranged to be about 400 yards. If I could crawl to the top of it, I’d be able to shoot prone. That would give me an approximately 400-yard shot through a gusting 20 mph wind, at the bedded buck. I felt like he was already mine as I planned my approach.
My Intro to the Basics
Not that long ago, an impending shot like this would have given me anxiety. I grew up deer hunting in the woods of Northern Wisconsin. As an enlisted man in the orange army, I learned how to shoot through narrow windows in the brush, hit moving deer, and capitalize on the first good shot opportunity that presented itself. A 100-yard shot was considered a long one at our deer camp. We killed a whole lot of deer without ever touching an exposed turret — and we still do.
But later, as I had the chance to hunt big game in the open landscapes of the West, I discovered that I was underprepared for many of the longer shot opportunities. Accepting the velocity data off the box of ammo and then using Kentucky windage wasn’t cutting it. Neither was using a variety of cheap shooting sticks or just trying to rest my rifle on my backpack. I did kill game just fine. It’s not like I was wounding a bunch of critters. But looking back now, I did miss some shots I should have made, and even with some of the animals I killed, the shooting could have been cleaner.
Then, a few months back, I shot in my first NRL Hunter match. Leupold hosted a handful of us writers for a two-day training session followed by two days of competition. I think there’s a perception that NRL is a one-way road to long range hunting. But after trying it, I actually don’t think that’s the case.
In just those four days of training I learned some critical lessons and skills that have already made me a more lethal (and ethical) hunter. To be clear, the experience didn’t extend my shooting distance at all. I still keep my shots to about 400 yards and in, regardless of where I’m hunting. But it did make me more capable at the distances I’d already been shooting from. Here’s how understanding the very basics can help you, too.
Get Your Actual Muzzle Velocity
I promise the rest of this article won’t be pushing you toward buying expensive gear. But hear me out on this part: You really do need a Garmin chronograph, or at least you need a buddy who has one. Documenting accurate muzzle velocity for your specific bullet, through your rifle, is the building block for everything that comes next.
During the NRL training we were all shooting the same factory Hornady loads out of the same Seekins rifles, but I was surprised to see that from shooter to shooter there were significant differences in muzzle velocities. Those differences matter more and more the farther down range you go.
For example, back in that South Dakota draw, I was shooting a 6.5 PRC Federal Fusion bullet. The average muzzle velocity out of my rifle was 3027 fps. The advertised MV on the box says 2975 fps. That 52 fps delta translates to a difference of about 2 inches of drop at 400 yards and a difference of more than 3 inches at 500. Taking that slop out of your data is key to shooting confidently in the field.
Calculate Your Come Ups and Windage Holds (There’s an App for That)
With your real muzzle velocity and cartridge information you can build a dynamic dope card through Hornady’s 4DOF app. You can go way deep on this if you like, but for shooting inside 400 yards, just get as close as you can with the basic inputs like temperature and elevation.
Where this app really shines, especially in a hunting scenario, is helping to calculate windage holds. Yeah, you still have to make an accurate wind call in the field, but you don’t have to guess what that call will mean in terms of drift. In other words, we’re taking one variable (your math skills under pressure) out of the equation.
Verify Everything
Ahead of the match, we spent a full day zeroing our rifles and then verifying the come ups from the 4DOF app. I realize that not every hunter has a 400-yard range near home to do all the shooting that their heart desires. But even just one day of dedicated shooting with your setup at a variety of ranges will tell you if you’re really dialed in — or if you’re not.
The NRL competition itself was a humbling event for all of us. Even the very good shooters struggled through certain stages. But that experience of shooting at long, tricky targets was a great way of verifying our limitations. In other words, if I couldn’t hit a steel target from, say, 700 yards with my first round in the match, then why would I ever attempt such a shot on a hunt?
Tripod, Bipod, and Bag

In my intro NRL Hunter match everyone was geared up with a tripod, shooting bag, and bipod on their rifle. OL shooting editor John Snow and senior staff writer Tyler Freel have done some excellent reviews of tripods and bipods. But some of these products (especially the lightweight carbon models) can get bloody expensive. So if you already have a tripod for your spotting scope, you can probably get by with adding a simple tac table. The tried and true Harris bipod still works just fine, too.
Add in an Armageddon gear shooting bag and you’re ready to rock. This system is compatible with any rifle — you don’t need Arca rail on the forend of your rifle to shoot off the tripod with the bag. And with practice (lots of practice), you’ll be able to find a stable, supported shooting position in any hunting scenario.
Putting It All Together

For each stage of an NRL Hunter match you must locate, range, and hit targets under a time crunch. The only way to do this without things devolving into an embarrassing shitshow is to have a detailed process that you execute the same way every time. The pressure of that timer ticking down induces anxiety, which is about as close as you can get to buck fever without actually catching it.
The best competitors cruise through their process so smoothly that it doesn’t look like they are hustling at all, even though they’re moving impressively quickly. For new competitors, the key is to avoid making the dumbest of mistakes (like say, forgetting to dial your scope). That means slowing the hell down.
So back in that draw in South Dakota, I took my time. I glassed the approach to my shooting position carefully to ensure that I wouldn’t bump deer along the way. I put the expected range and estimated wind speed and direction into my 4DOF app before even approaching my shooting position. After inspecting the hill closely with my spotting scope, I knew that I’d be able to shoot from the prone position. So when I neared the top of the hill, and confirmed that the buck was still bedded where he was supposed to be, I dropped my pack and tripod for a stealthier approach. I crawled into position just below the cover of the short prairie grass.
I extended the bipod legs. Ensured my muzzle was clear of the grass. Confirmed distance and wind speed. Dialed for elevation. Chambered a round … and then I was hit with a wave of excitement. I was about to shoot a big old prairie buck. He’d probably be the widest whitetail I’d ever killed.
Rather than finding the buck in my scope and hammering the trigger, I took some time to just lie there and calm down. I focused on what I still needed to do to make a good shot. The wind was blasting from right to left at about 20 mph. That would mean 13 inches of bullet drift at this range. But I knew the buck, tucked back in his draw, was more sheltered from the wind compared to where I was at the top of the drill.
So I decided to aim at the base of his neck. That way, if the bullet really did drift a foot back, I’d still hit him through the lungs. But if the wind was flat in that draw, my shot would still kill him cleanly.
When I found the buck in my scope now, I didn’t feel excited. I didn’t feel anything. The reticle was steady, the gun went off, and the buck’s head flopped to the ground. He never rose from his bed. My bullet had hit precisely where I’d aimed.
Read Next: The Best Hunting Tripods, Tested and Reviewed
I felt an immense sense of pride in that. The buck had been dozing one second and he was dead the next. It was as swift a death as any wild critter could have.
And that, I think, is the highest purpose of practicing long range rifle skills and understanding the basics of modern riflery. It’s not about shooting animals from farther away — at least not for me. It’s about better marksmanship at all ranges, so that the buck gets the quick, clean ending that he deserves.
Read the full article here


